


How to Conduct Move-In and Move-Out Inspections: A Comprehensive Guide
Conducting thorough move-in and move-out inspections is essential for protecting your property investment and ensuring a fair process for both landlords and tenants in Dubai. These inspections meticulously document the property’s condition at the beginning and end of a tenancy, serving as crucial evidence to prevent disputes over damages and security deposit deductions. Mastering this process involves careful preparation, detailed documentation using checklists and photos/videos, understanding local regulations, and knowing the key differences between the two inspections.
Why are Move-In/Move-Out Inspections Crucial in Dubai?
These inspections aren’t just procedural formalities; they are fundamental risk management tools for property owners and a safeguard for tenants navigating the Dubai rental market.
- Protects Landlord’s Investment: Establishes a clear baseline condition of the property, making it easy to identify damages that occurred during the tenancy versus pre-existing issues. This is vital whether you own apartments or villas across Dubai.
- Safeguards Tenant’s Security Deposit: Provides tenants with documented proof of the property’s initial condition, protecting them from unfair charges for damages they didn’t cause upon vacating.
- Minimizes Disputes: Clear, signed documentation, ideally supported by photographic evidence, significantly reduces disagreements over security deposit deductions at the end of the lease term, fostering better landlord-tenant relationships.
- Provides Legal Evidence: In the event of a dispute requiring intervention from RERA (Real Estate Regulatory Agency) or the Rental Dispute Center (RDC) in Dubai, these reports serve as vital, objective evidence.
- Facilitates Maintenance & Turnover: Helps identify necessary maintenance or potential issues early on (move-in) and pinpoints required repairs or deep cleaning needed before welcoming the next tenant (move-out), ensuring your properties for rent in Dubai are always presented in top condition.
For property investors in Dubai, ensuring these inspections are handled professionally is key. Utilizing expert property management services like those offered by West Gate Dubai can streamline this entire process, ensuring compliance with local practices and protecting your valuable asset.
Preparing for the Inspection: Setting the Stage
Preparation is paramount for an effective and efficient inspection. Don’t rush this stage.
Gather Your Tools
Ensure you have everything you need before starting:
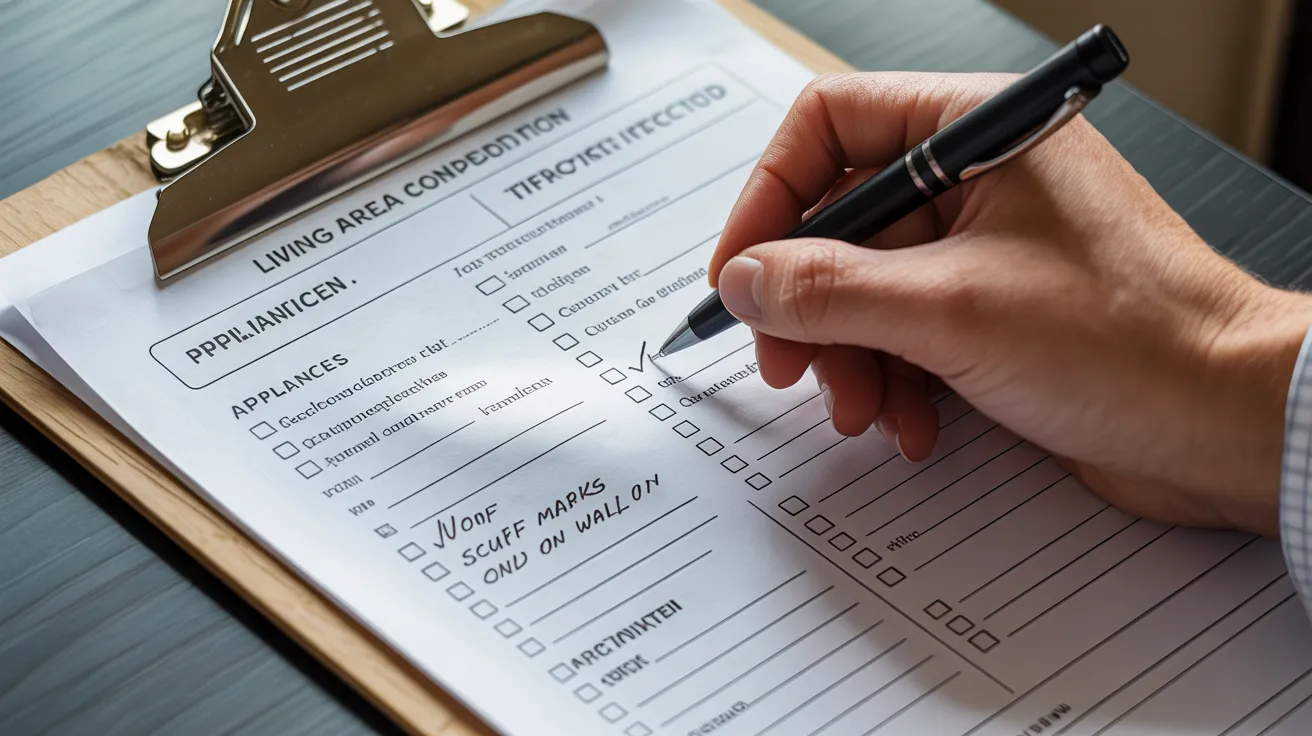
- Detailed Inspection Checklist: A comprehensive, standardized form covering every room, fixture, and feature. Digital checklists on tablets are increasingly common and efficient.
- High-Quality Camera/Smartphone: High-resolution photos and videos are non-negotiable evidence. Ensure good lighting and capture timestamped visuals if possible.
- Pen and Clipboard (if using paper): For clear notes and signatures.
- Copy of the Ejari Registered Tenancy Contract: To reference specific clauses, included appliances, or agreed-upon conditions.
- Flashlight: Essential for inspecting dark corners, inside cupboards, closets, and behind appliances.
- Small Tools (Optional): Like a plug tester to check outlets quickly.
Scheduling Appropriately
- Move-In Inspection: Schedule this before the tenant moves in any personal belongings, ideally on the day they receive the keys. The property must be vacant, professionally cleaned, and fully ready for occupancy.
- Move-Out Inspection: Schedule this after the tenant has completely vacated, removed all belongings, and ideally, completed their end-of-tenancy cleaning, but before you commence major turnover maintenance or repainting.
- Tenant Presence is Recommended: Conducting the inspection with the tenant present (for both move-in and move-out) promotes transparency, allows for immediate discussion of findings, and helps prevent future misunderstandings.
Conducting the Move-In Inspection: Establishing the Baseline
The move-in inspection meticulously documents the property’s condition at the very start of the tenancy. Accuracy and detail are vital.
The Systematic Walkthrough
Proceed room by room, methodically checking each item against your checklist. Don’t overlook hallways, balconies, storage areas, maid’s rooms, or any external areas like gardens or parking spaces included in the contract.
Key Areas for Documentation (Checklist Essentials)
Your checklist should be detailed. Here’s a sample breakdown:
| Area | Items to Check | Condition Notes (Examples) |
|---|---|---|
| Entry/Hall | Door, locks, doorbell, flooring, walls, ceiling, light fixtures. | Minor scuff on wall near door, light working |
| Living/Dining | Flooring (carpet, tile, wood), walls, ceiling, windows (glass, frames, locks), AC vents, outlets, lights. | Carpet clean, small chip in window sill |
| Kitchen | Countertops, cabinets (inside/out), sink, faucet, appliances (oven, hob, fridge, dishwasher – test function), floor, walls, lights. | Oven clean & working, minor scratch on counter |
| Bedrooms | Flooring, walls, ceiling, windows, closets (shelves, rods), AC, outlets, lights. | Wardrobe door slides smoothly, AC functional |
| Bathrooms | Toilet (flush, seat), sink, faucet, shower/tub (drainage, head), tiles (grout, cracks), mirror, ventilation, lights. | Shower drains well, small crack in floor tile |
| Balcony/Ext. | Flooring, railings, walls, drainage, lights. | Balcony floor clean, railing secure |
| General | Paint condition throughout, overall cleanliness, smoke detectors, AC thermostat function. | Freshly painted, professionally cleaned |
The Power of Visuals and Specificity
- Be Specific: Don’t just write “damaged.” Describe it: “5cm hairline crack on bathroom sink,” or “Deep 10cm scratch on bedroom door.”
- Comprehensive Photos/Videos: Document the condition of everything, especially any pre-existing wear or minor damage. Take wide shots of each room and close-ups of specific items and any noted issues. Narrating a video walkthrough can also be effective.
Signatures Seal the Deal
Once the walkthrough is complete and the report filled out, both the landlord/agent (like West Gate Dubai) and the tenant(s) must sign and date the inspection report. Ensure the tenant receives a complete copy for their records. This signed document confirms mutual agreement on the property’s condition at the commencement of the lease.
Conducting the Move-Out Inspection: The Comparison Point
The move-out inspection is where you compare the property’s final condition against the signed move-in report to identify any new damages beyond normal wear and tear.
Using the Move-In Report as the Benchmark
Bring the signed move-in inspection report (and ideally, the photos/videos) to the move-out walkthrough. Reference it directly as you inspect each area, carefully noting any discrepancies, new damages, or areas requiring cleaning.
Identifying New Damage vs. Normal Wear and Tear
This is often the most crucial part and requires careful judgment. Understanding the difference is key to fair security deposit handling:
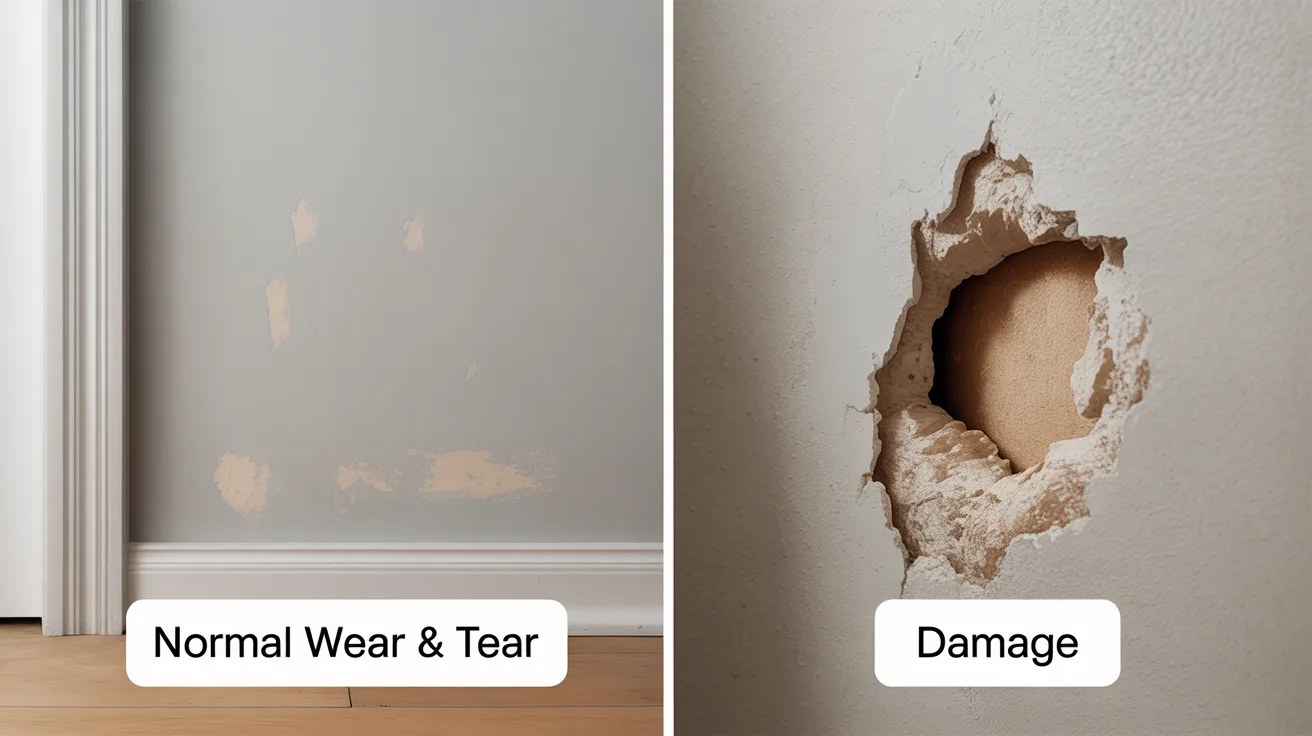
- Normal Wear and Tear: This is the natural and gradual deterioration resulting from ordinary, everyday use and aging. Landlords are typically responsible for addressing this. Examples include:
- Minor scuff marks on walls or door frames.
- Faded paint or wallpaper due to sunlight.
- Lightly worn patches on carpets in high-traffic zones.
- Loose door handles or cabinet hinges from regular use.
- Minor scratches on countertops.
- Damage: This results from negligence, accidents, misuse, or intentional actions by the tenant or their guests. The cost of repairing such damage can usually be deducted from the security deposit. Examples include:
- Large stains, burns, or tears in carpets or upholstery.
- Holes in walls (beyond small nail holes for pictures, if permitted).
- Broken windows, mirrors, or tiles.
- Damage to appliances due to improper use (e.g., broken shelves in fridge).
- Significant scratches or gouges in wood flooring.
- Unauthorized painting or alterations.
- Excessive dirtiness requiring more than standard cleaning (e.g., greasy oven, heavily stained grout).
“Normal wear and tear refers to the gradual deterioration… that occurs due to ordinary, everyday use. It is the natural aging of materials… Property damage… goes beyond normal wear and tear, often caused by negligence, misuse, or intentional actions…” – Legal Templates
Documentation and Agreement
Document any new damages thoroughly with photos/videos, clearly showing the issue and referencing the move-in condition. Discuss the findings with the tenant during the inspection if they are present. Both parties should ideally sign the move-out report, acknowledging the final condition, even if there are disagreements about responsibility for certain items (these can be noted).
Security Deposit Handling
After the inspection, calculate the cost of repairing tenant-caused damages. Provide the tenant with an itemized list of deductions and supporting evidence (invoices, quotes) as per Dubai’s regulations and the terms of the tenancy contract. Return the remaining deposit balance within the timeframe stipulated by law or the contract.
Tips for a Smooth Inspection Process
- Use a Consistent Checklist: Employ the same detailed checklist for both move-in and move-out.
- Be Objective and Fair: Approach the inspection professionally, focusing on facts, not emotions.
- Communicate Clearly: Explain the process and findings to the tenant respectfully.
- Understand Local Laws: Be aware of RERA guidelines and standard practices in Dubai regarding inspections and deposit deductions.
- Consider Professional Help: Especially for investors with multiple properties or those residing overseas, using a reputable property management company is invaluable.
Leverage West Gate Dubai’s Expertise
Navigating property inspections and management in Dubai requires local knowledge and diligence. At West Gate Dubai, we offer comprehensive property management services that include meticulous move-in and move-out inspections, tenant liaison, maintenance coordination, and ensuring your property remains a prime asset, whether it’s listed among properties for sale in Dubai or for rent. Let us handle the details, so you can enjoy the benefits of your investment with peace of mind.
By implementing a thorough inspection process, landlords can protect their assets, and tenants can ensure a fair return of their deposit, contributing to a healthier rental market in Dubai.